Uploading Data to an Archive
After you have created your archive, it is time to add data to it.
Data Preparation (DICOM format)
We assume that the data you want to upload is accessible from your local machine and is stored in DICOM format. Before you proceed, make sure that the following checklist is completed:
Data Preparation Checklist
Must
⬜ The data is properly anonymized (no personal identifiers in DICOM headers and no burned-in patient information in the pixel data).
⬜ You have the right to upload and share the data on the platform.
⬜ The total size of the upload folder is not more than 10 GB.
⬜ All data you want to upload is contained in one upload folder (nested subfolders are allowed).
⬜ The upload folder contains the DICOM objects you want to upload (file extensions may vary; DICOM files do not necessarily end with .dcm).
Should (recommended)
⬜ Remove unrelated files to speed up upload (e.g. viewer installers, README.txt, .DS_Store).
⬜ Double-check that the folder contains the intended studies/series only (avoid mixing unrelated studies in one upload).
Notes
ℹ Some PACS exports include a DICOMDIR file. This is expected and can be kept.
ℹ If unrelated files are present, they will be discarded by the platform during upload.
Data Upload
Follow these steps to upload data to your archive:
-
1
Compress the entire upload folder to a ZIP file.
-
2
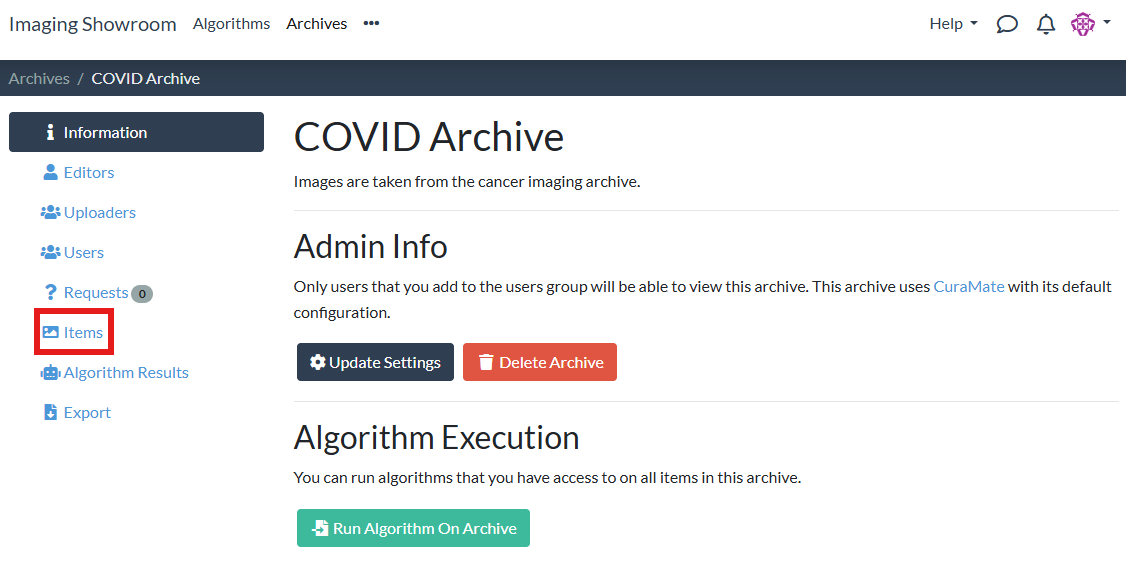
Go to your archive and select the "Items" tab in the sidebar:
-
3
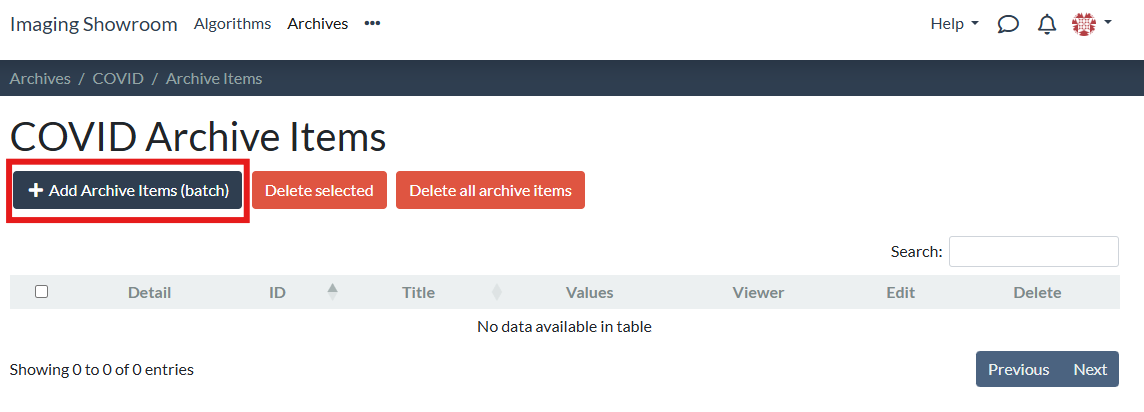
Click the "# Add Archive Items (batch)" button:
-
4
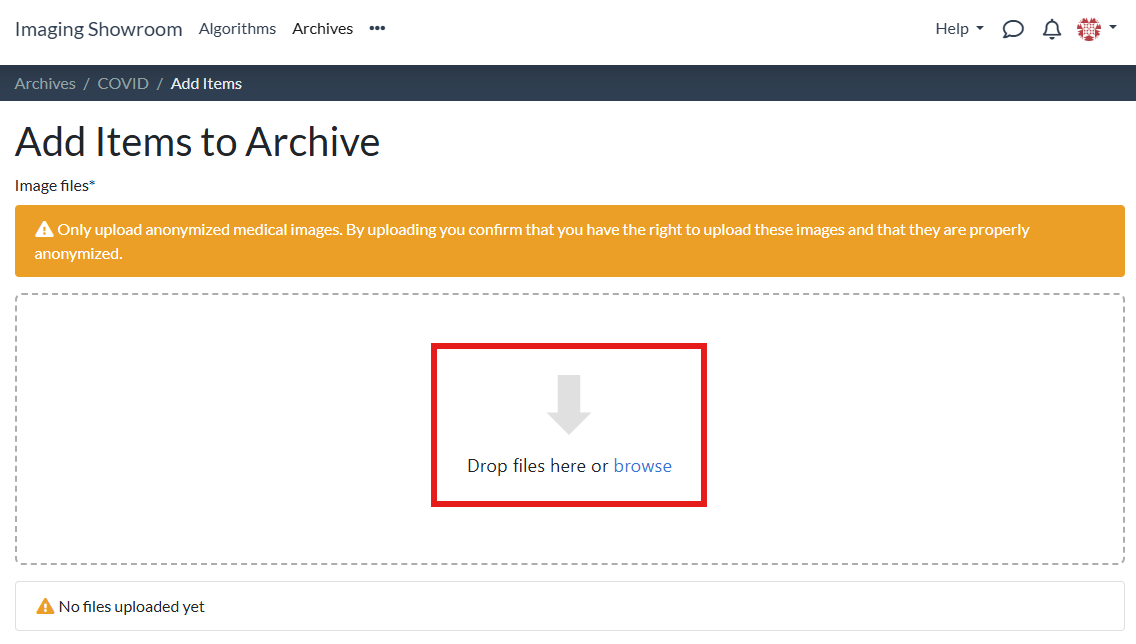
Use the drag-and-drop widget to select your zipped upload folder:
-
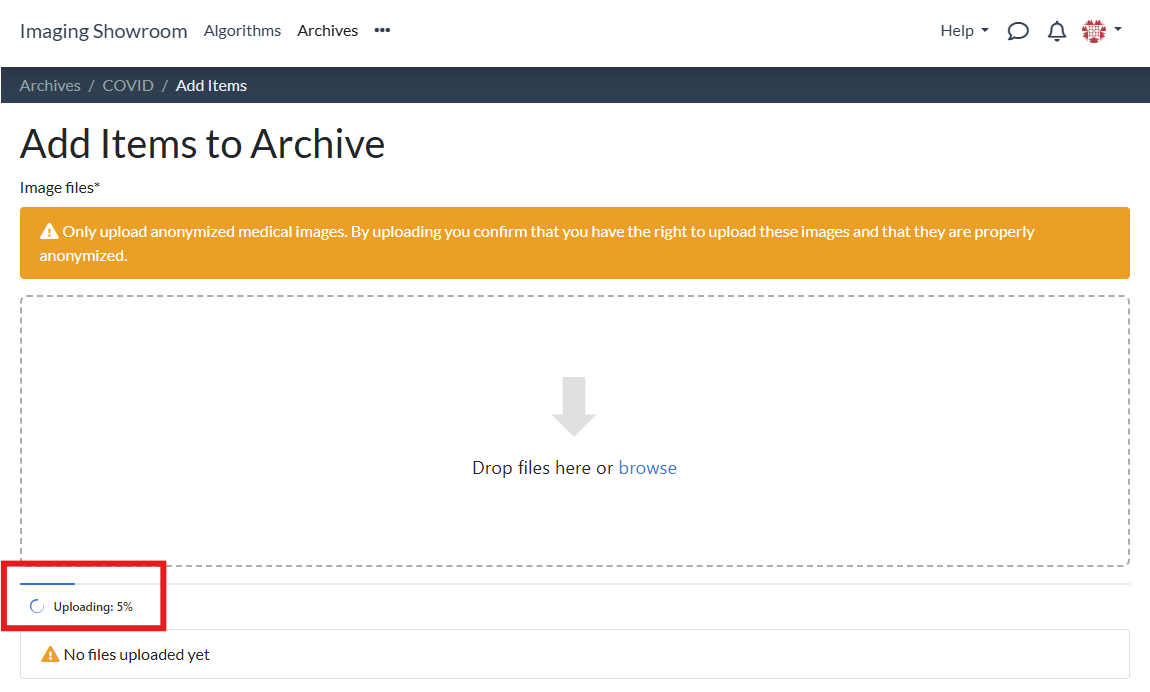
5
Wait while the upload is progressing:
-
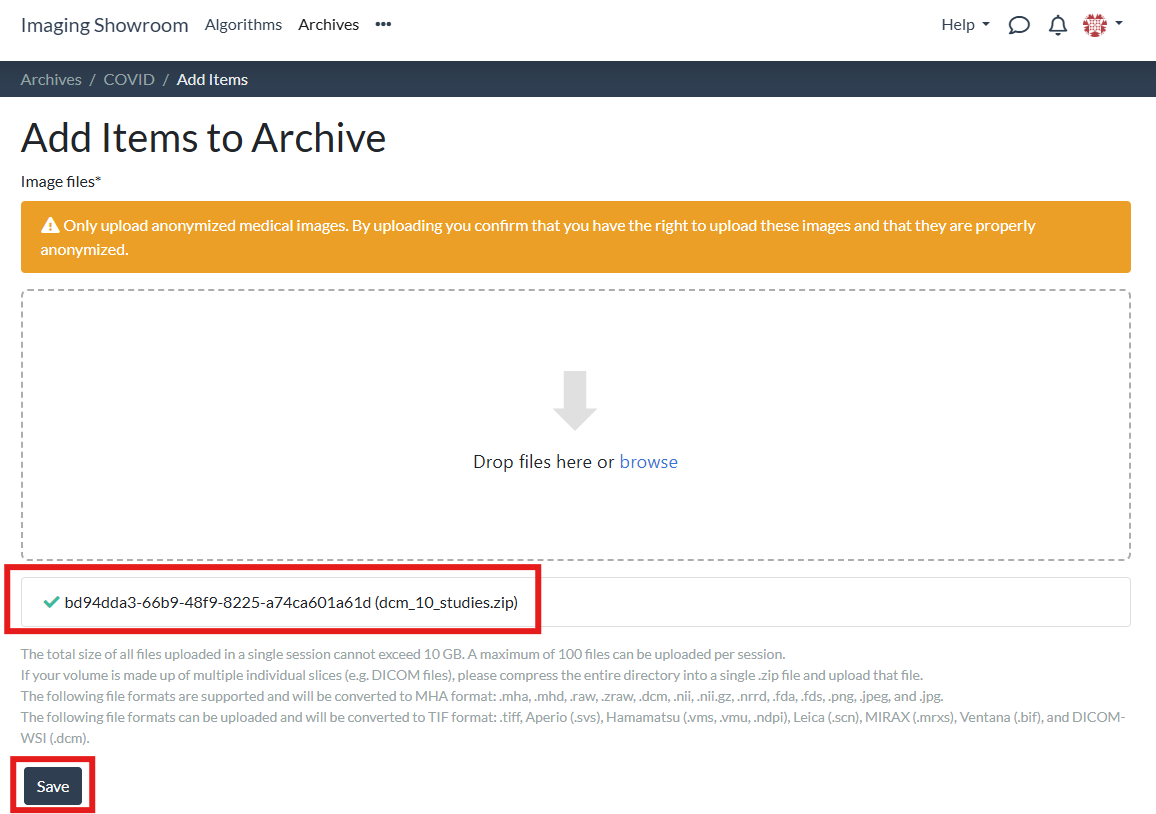
6
After the upload has finished successfully, your uploaded file will be displayed with a green checkmark and you can click Save:
-
7
You will be redirected to a dedicated page for your upload session:
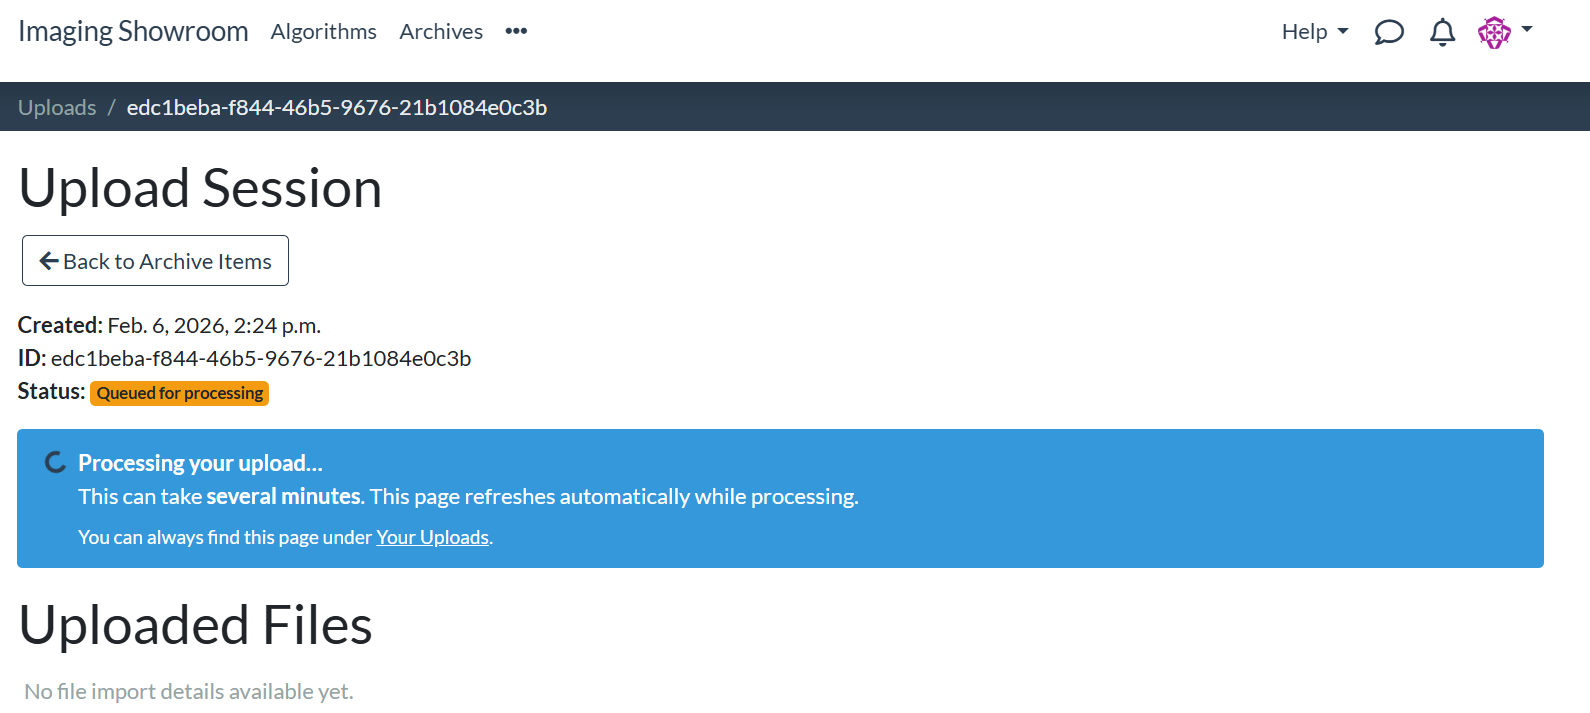 Your uploaded files are processed by the backend. This includes conversion of the DICOM files to MHA format. This usually takes at least 5 to 10 minutes.
-
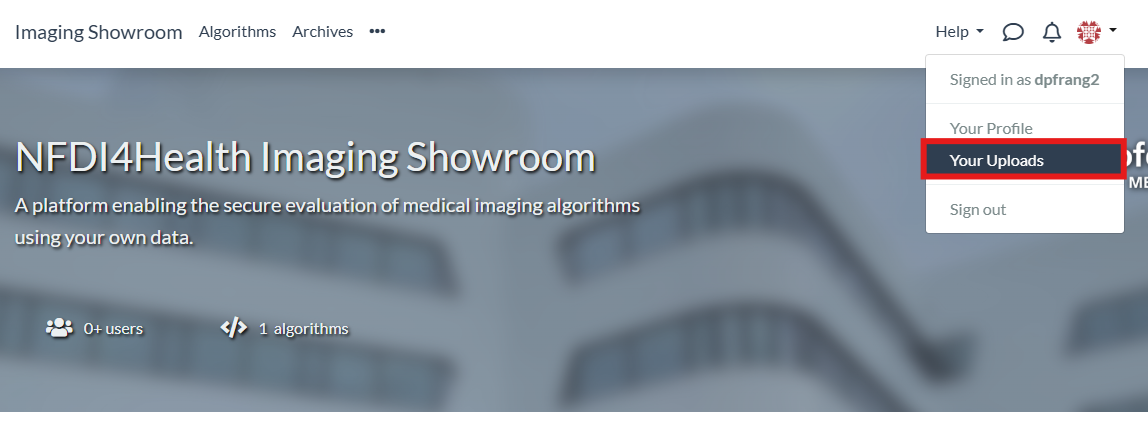
8
If you want to close the session and come back later to check the upload status, you can find the upload session under "Your Uploads":
-
9
Once your upload has succeeded, a list of successfully uploaded images is displayed for your upload session:
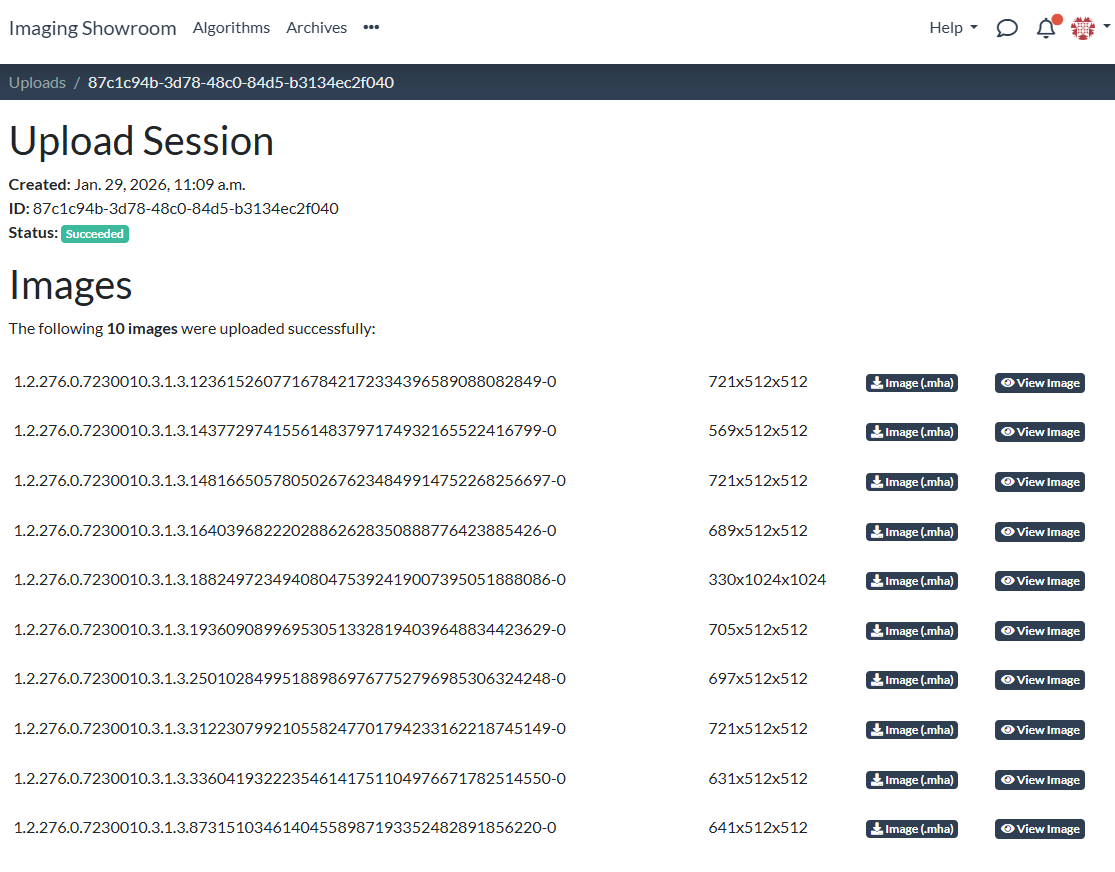 You should check that the number of images is as expected.
-
10
Further down on the upload session page, you see a list of files that could not be imported:
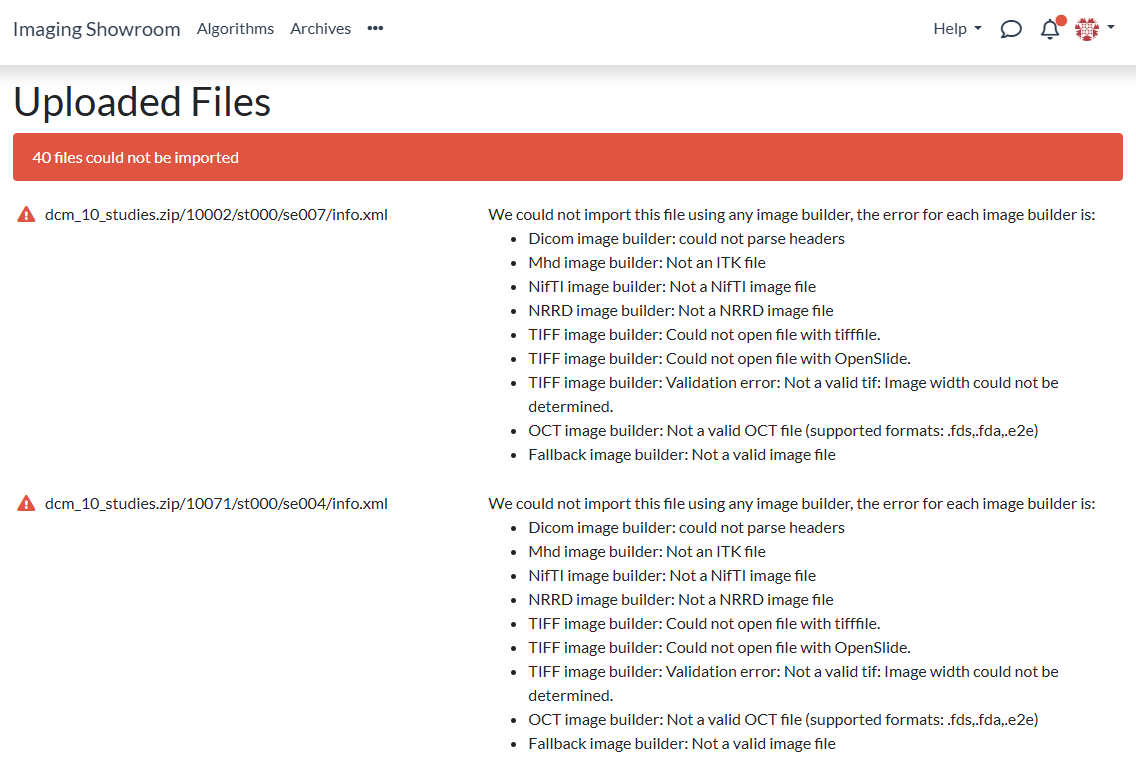 Usually, these files are metadata that are part of the DICOM export. You can check this list to see if any of the DICOM files could not be imported.
-
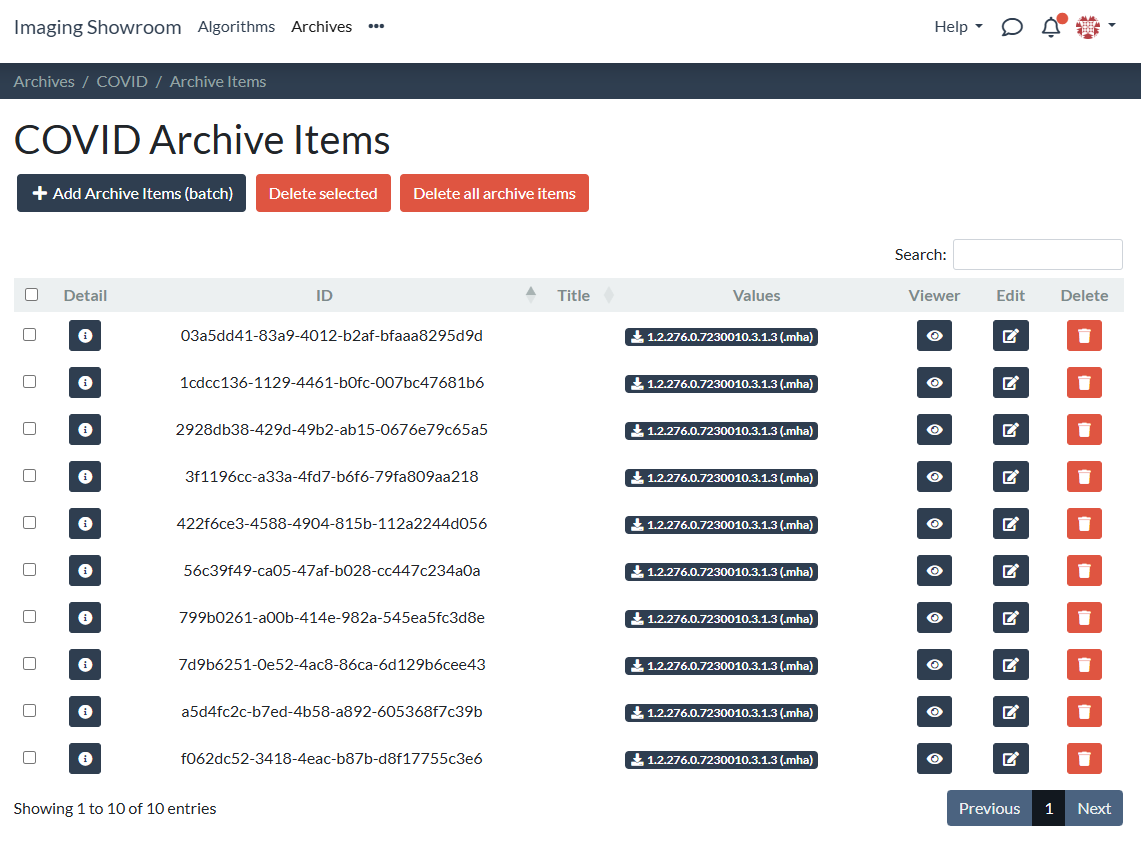
11
Navigating back to the "Items" tab, you can see one archive item for each uploaded image: